How To GET BETTER At Street Photography FAST

The Challenge
Street photography can be both incredibly rewarding and frustrating at the same time. You head out hoping to capture something special, only to return with unispiring and forgettable photos. I know the feeling pretty well. When I started shooting street photography over ten years ago, there were hardly any online tutorials or guides. I spent countless hours experimenting and learning through trial and error and my improvement was painfully slow.
Today we have the opposite problem: too much information! YouTube videos, courses, online resources… and yet many photographers still feel stuck and overwhelmed. That’s exactly why I wanted to share with you the five lessons I wish someone had given me back then in a simple and practical way. So let’s get started!
Stick To One Focal Length
One of the fastest ways to get better at street photography is to stick with a single focal length for an extended period of time. For years I ignored this advice and it’s one of my biggest regrets.
Constantly switching focal lengths with a zoom lens slows you down and makes your images look flat. Instead of focusing on composition and better positioning yourself, you end up wasting time deciding which focal length to use (and in most cases you will use the wrong one). I know that because I used to do exactly these very mistakes! Once you commit to just one focal length, your street photography will improve dramatically pretty quickly. So how do you choose the right focal length?
Two easy approaches
Use a zoom or kit lens (e.g. 24–70mm), shoot for a few days, then check which focal length you naturally use the most and commit to that.
Look at the work of street photographers you admire, find out which focal length they use, and use that as your starting point (this is my favourite approach).
Once you’ve chosen your focal length, use a prime lens and stick with it for several weeks. The benefit of using a prime lens is that it forces you to be more intentional about how you frame your scene and how you photograph. If you only have a zoom lens, simply lock the focal length (tape it if necessary) and treat it like a prime.
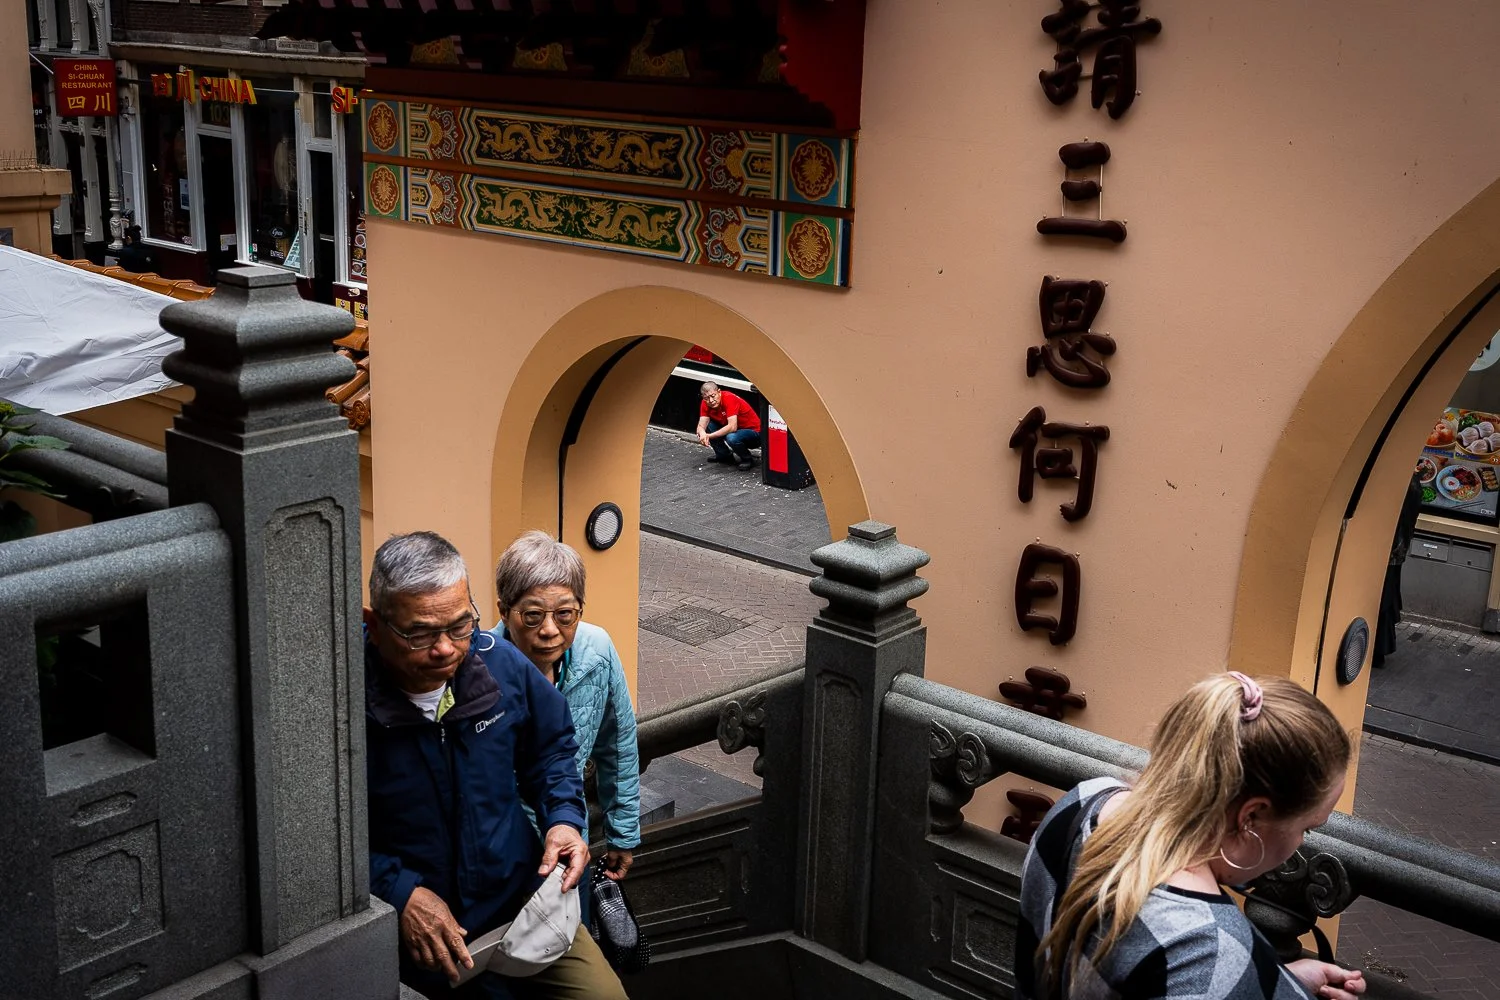
Below is a sample of photos I took after using 28mm for many days in a row.


Understand The Basics But Forget The Rules
There’s so much information online about what you should or shouldn’t do in street photography that it can quickly become overwhelming. Concepts like the rule of thirds, leading lines, and framing techniques are useful, but when you’re just starting out, trying to think about all of them at once can block your creativity.
I struggled with this myself too. Instead of focusing on what was happening in front of me, I kept searching for negative space or leading lines even in scenes where these things didn’t exist. Even though it’s important to understand these principles and apply them when they naturally appear, don’t obsess over them or go out looking for them. Instead, focus on whatever is happening right in front of you and let the scene guide your composition.
To keep things simple in street photography you only need to keep 2 things in mind:
Avoid clutter in your photos. You can do this by choosing a clean background or by getting closer to your subject
There should be a clear subject (or a gesture/expression/action) in your frame. Basically anything that shows what is going on and grabs attention


If A Shot Is Too Easy…Don’t Take It!
One of the fastest ways to improve your street photography is to avoid the photos everyone else takes. Shooting the back of an alley with a couple of people passing by, or capturing people’s backs, will never stick in anyone’s memory. Instead, look for moments that spark curiosity: a facial expression, a gesture or an interaction that has something to say. These are the moments that make the viewer pause and watch closely.
And yes, that usually requires effort and patience. If you find a great background, wait until the right person walks through with the right posture or presence. If you’re in a busy area but nothing is happening, stay and observe until an interesting moment appears. Try to work for your photos and capture something most photographers wouldn’t. There’s nothing more rewarding than capturing a photo you truly put effort into, rather than just clicking and moving on.
Below is a sample of couple of simple photos you should resist from capturing.

Stop Fiddling With Your Camera
In my early days of street photography, I missed capturing countless great moments because I was too busy trying to nail my camera settings. On the street, capturing the moment is far more important than having the “perfect” settings. A noisy or slightly blurry photo is better than no photo at all.
The key here is to remove decision-making and automate as many camera settings as possible so you can stay focused on what’s happening around you. Nowdays I use a pre-defined set of values for aperture and shutter speed depending on light conditions and I leverage Auto ISO. This way when I am shooting I basically only adjust the exposure compensation through a dedicated dial. In terms of focusing here are some options you can use from easiest to most effective:
Wide Autofocus – lets the camera decide. Simple, but not very accurate.
Spot Autofocus + Reframe – more accurate, but slower.
Manual Zone Focusing – pre-set a focus distance and shoot within that range. It requires practice, but it’s the most efficient for street photography.
Study Other Street Photographers
If you want to improve fast in street photography, it is crucial to study the work of photographers you admire. Just like in music or art, reviewing other artists work helps you understand what makes an image strong and gives you a clear goal to aim for.
Alex Webb, for example, had a huge influence on how I photograph the streets, especially his layered compositions. Trying to shoot with that mindset has pushed my photography forward more than any technical tip. If you’re serious about street photography study the work of artists you admire before you shoot. You can start online by exploring their portfolios and background.
Another powerful tool is photobooks. Holding a photo in your hands makes it more memorable and can deeply influence your own photography. You don’t need a big collection, just a few key books can have a positive influence on you. In case you don’t know where to start here are some of my most favorite photobooks:
Disclaimer:The links above are affiliate links which means I earn a small commission if you purchase something through them but it won't cost you anything extra.
Your Plan For The Next 4 Weeks
Now that you've heard about all five lessons, here is a simple plan you can follow:
Photograph using only one focal length for the next 3–4 weeks
When you are out shooting keep only 2 things in mind: avoid clutter in your photos and capture something that sparks curiosity
Avoid taking the easy shots (avoid capturing the backs of people or random alleyways from afar)
Automate and remove decision making from as many camera settings as possible
Study the work of your favorite artists and try to imitate the shots that speak to you
I guarantee that if you're consistent with these five steps, you'll start seeing results in weeks or maybe even days, while having fun at the same time. For more details check out my full Youtube video below.