How To Master LIGHT In Street Photography

Light Changes Everything
Light has the power to turn ordinary street scenes into something magical or even unreal. Even though capturing good photos in strong light is easy, capturing exceptional photos is always a challenge. With this blog I want to guide you on how to master light in order to capture those exceptional photos. We will cover the following:
What to look for when you are out photographing
What camera settings to use to expose correctly
By the way, you should not wait for the perfect light conditions to go out and photograph. For those overcast and cloudy days read my blog about How to take GREAT photos during BORING light.
How To Photograph
When the light is good it’s very easy to get overwhelmed with what to photograph since there are so many opportunities for great photos. So instead of overanalyzing every type of light (side light, backlight, or front light etc) I will focus on simple, practical approaches:
Light & Shadow
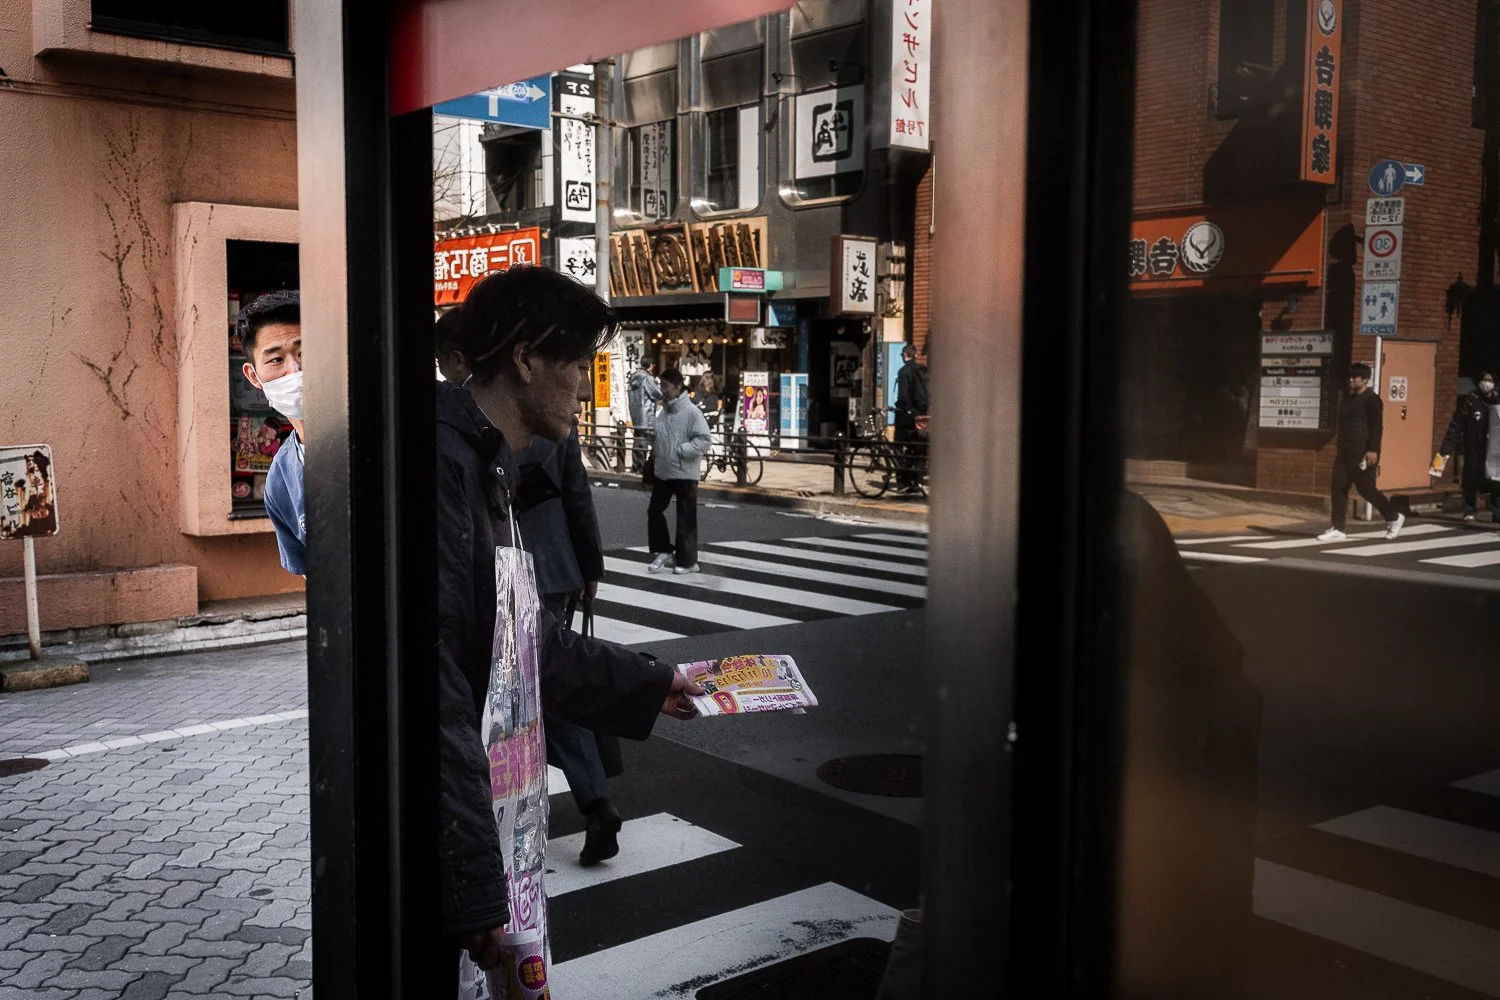
A common tip in street photography is to “follow the light.” While this is a good starting point, it’s not enough on its own. A more effective approach is to seek out pockets of light framed by deep shadows. High-contrast areas naturally draw the eye and make your scene more dramatic. Once you find such a spot wait for a subject to enter the frame. Depending on their position they might be fully illuminated or appear as a silhouette. Patience is key here: observe how people interact with the light and experiment before pressing the shutter.


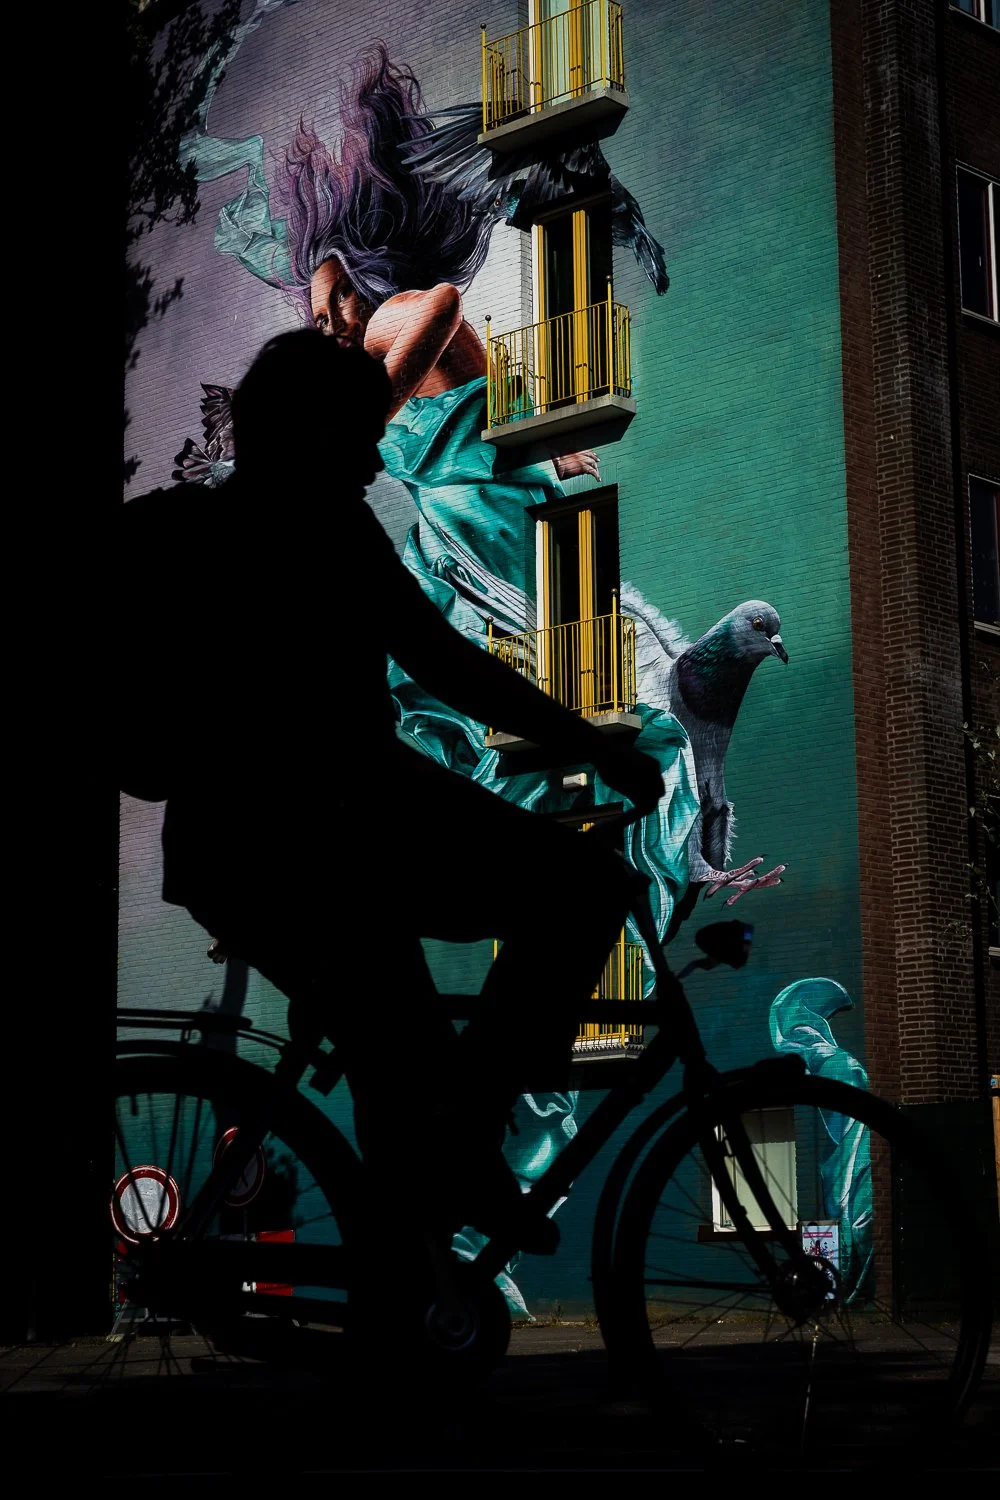
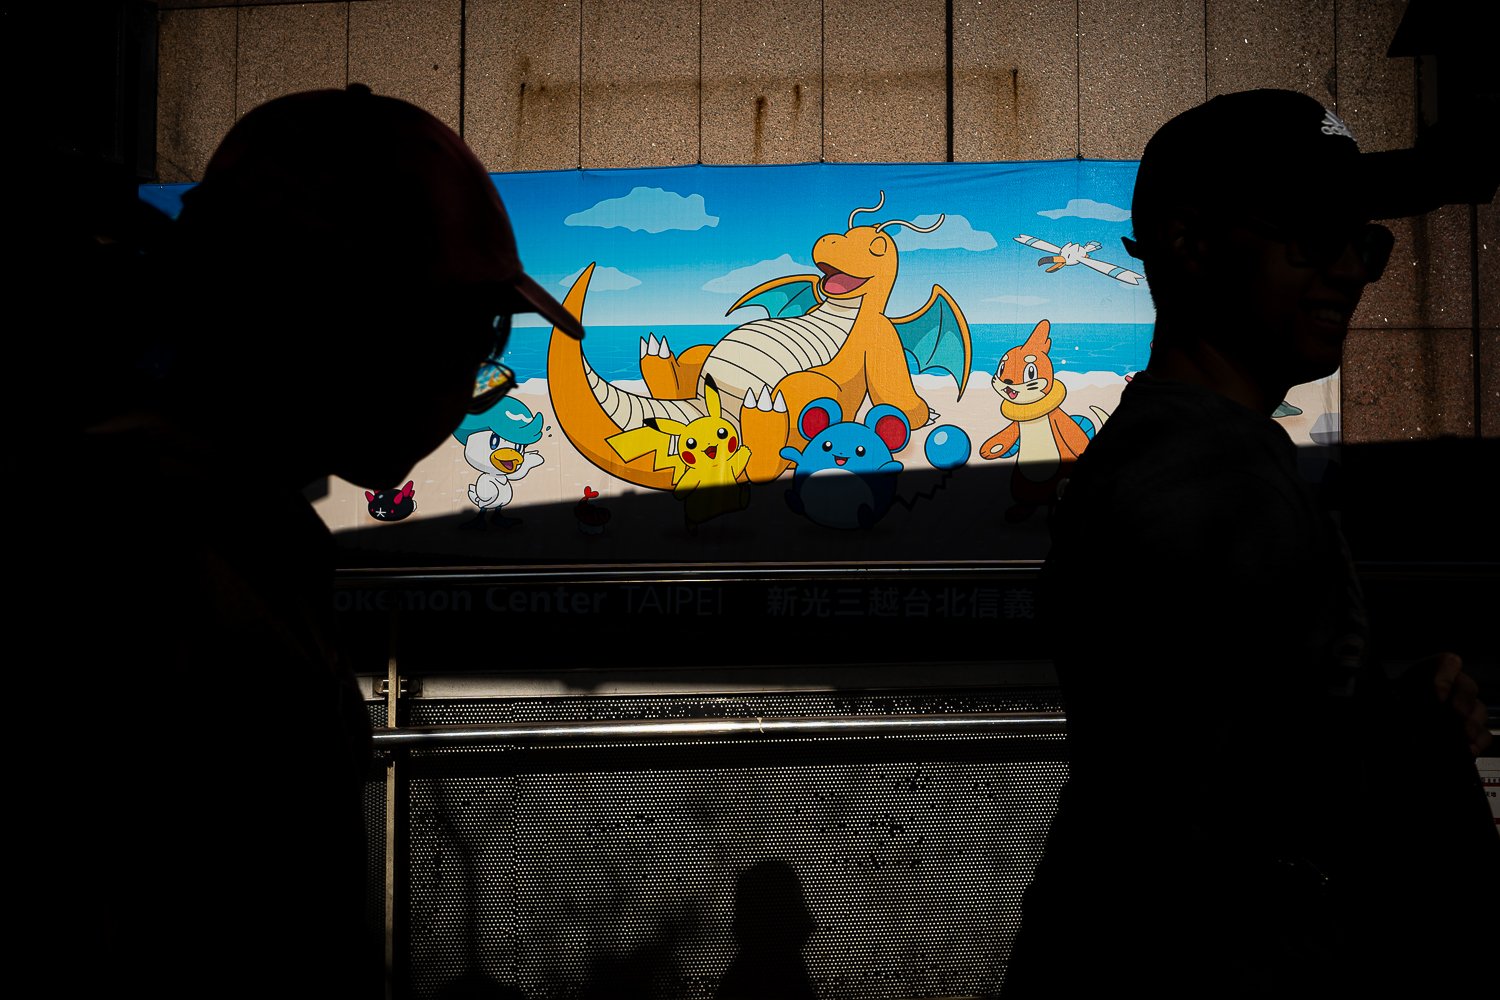
An even more impressive technique is to follow the previous step and capture a scene that includes BOTH a dark silhouette and a brightly lit subject. This contrast creates a powerful visual impact. The silhouette and the illuminated subject can both be people, or a combination of a person and a colorful element like graffiti or a poster. Achieving the right balance takes practice and movement, but the results will be extremely rewarding.

Another advanced approach is to use light and shadow to create a three-dimensional frame. Instead of focusing on scenes where the background is close, look for areas with depth, where subjects are spaced apart but still well-lit. This works well in open spaces like parks, or locations with distant backgrounds, such as metro stations or wide streets. Mastering this technique can make your photos stand out in ways that simple light-following cannot.


Gestures & Reactions
Strong sunlight often influences how people behave and especially the small gestures they make. During a day with strong light people will usually try to hide from the sun by covering their face with a hand, use umbrellas, or hide behind objects. At first, these subtle reactions can go unnoticed because we usually ignore these small automatic behaviors. Once you train your eye to look for them you’ll start seeing them everywhere. So next time you are out there keep an eye for those small gestures and reactions and once the moment is right take the shot.


Reflections
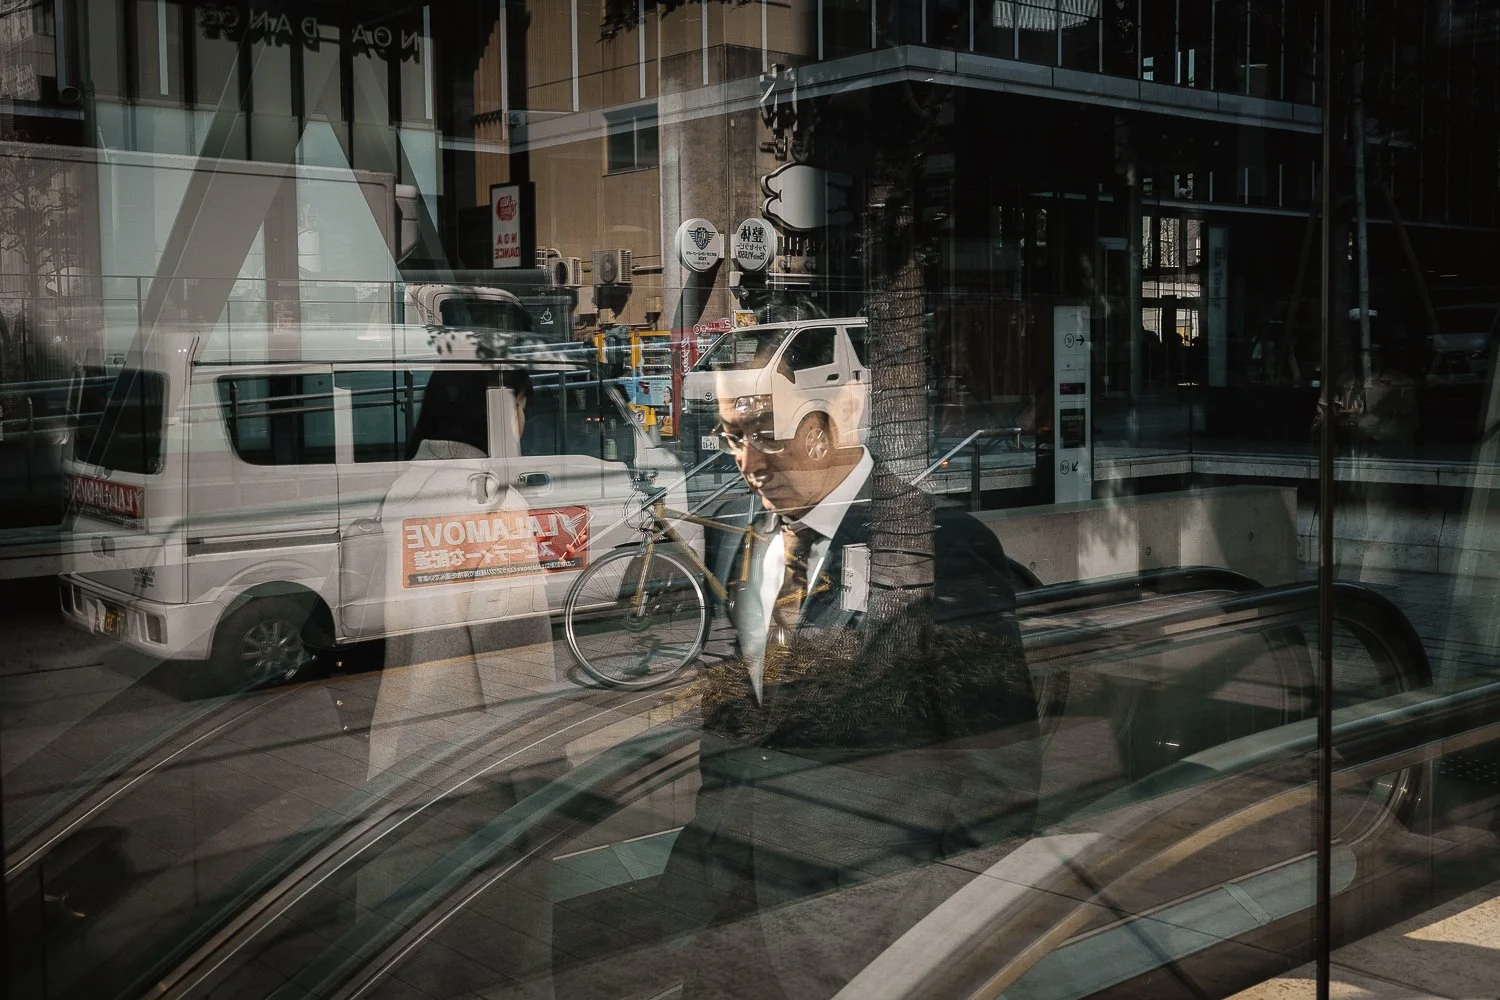
Reflections are a fantastic way to get creative when the light is strong, especially because on bright days they become more vivid and pronounced. The key is to look for reflective surfaces like windows, glass, or metallic objects. Once you find the right spot you will have to experiment and shift your position until you find scenes where the reflection and the real scene come together in a single frame. Often, a small shift in your position can reveal something completely unexpected, and that’s where the magic happens.

How to Expose Correctly
Camera Settings
No matter how good the light is, how you capture it, is what makes all the difference. Even the most perfect sunlight won’t translate into an exceptional photo if your exposure is off. As a starting point in bright conditions I usually set my camera like this:
Aperture: f/11
Shutter speed: 1/1000s
ISO & White balance: Auto
Max ISO 6400 for Full Frame
Max ISO 3200 for APS-C
With this setup your main focus while shooting is adjusting the exposure compensation by using the dedicated exposure dial on your camera.
Exposure
The key to strong photos in bright light is exposing for the highlights in order to have the brightest areas properly exposed and avoid blowing them out. In practice this often means underexposing your scene to achieve deep blacks and dramatic contrast. There are 2 ways to control your exposure (with the highlight metering being the preferred one / even though not all cameras have it):
Highlight Metering: Keep exposure around 0 stops
Multi/Evaluative Metering: Underexpose at around -2 stops
Depending on the scene in both cases you may need to adjust the exposure slightly up/down until you get deep blacks and properly exposed highlights. It is also crucial to keep an eye on the histogram of your camera and make sure that most of the scene is exposed to the left.


Final thoughts
Capturing truly exceptional photos in good light can definitely be a challenge but it’s also one of the most rewarding parts of street photography. Personally, there’s nothing I enjoy more than grabbing my camera and heading out on a sunny day.
Note: For more details check out my full Youtube video below which also includes a full guide on how to edit photos captured in good light.